Painting Lexan Bodies
by Chris Wilkinson, Great Hobbies Inc.
The following is my experience painting Lexan bodies for Radio Controlled models. If you have a comment, suggestion, correction or maybe a tip or trick, I'd like to hear it. Send some email to me at webmaster@greathobbies.com. I'll post your tips and tricks right here to help others, and myself!
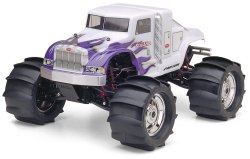
I have used the Pro-Line Peterbilt Big Rig painted by Pro-Line racing, as an example of before and after painting.
Crystal Clear
 Most Lexan bodies come clear, unless otherwise specified as painted. Depending on the manufacturer of the body, they will include decals and window masks. Providing clear bodies allows for the hobbyist to choose the paint scheme and colors, and also it keeps the cost lower.
 Flexible Paint
Lexan bodies are painted on the inside using polycarbonate paints. These paints adhere to the surface of the plastic and take on a flexible characteristic. In the event that your body takes a hit, the paint is resistant to cracking and chipping. Automotive type paints do not work on lexan, some will melt the plastic, others will just chip off.
General Painting Tips
Start with a clean canvas
When a lexan body is manufactured, the plastic may have a release agent residue. This oily coating helps the body release from it's mold, paint does not stick to this coating. Washing with dish soap and a soft cloth under warm water takes this film off. Rinse and dry very well, use a lint free cloth.
- Wash the body using dish soap and a soft cloth
- Don't forget the tight corners!
- Dry with a hair dryer or lint free cloth
Read the directions!
Some manufacturers suggest that the inside of the body be scuffed with light steel wool, such as an SOS pad. This makes perfect sense, as it gives the paint a better surface to adhere to. Check the directions of both your body, and paints. The worst possible outcome of your newly painted body is to watch it fall off in large chunks. I have experienced this once, it was probably a combination of too much paint, and a not-so-clean body.
- Read the directions!
- Scuff surfaces to be painted, if required
- Wash the body again to remove dust from scuffing
Masking
Anywhere you don't want paint, or want you want a different color, you're going to have to apply a mask. Use a high quality masking tape. Remember, when painting, it's applied dark, to light colors. If you want black windows, they are painted first, you'll have to mask all around the windows first. For some great masking ideas, tips, tricks and general R/C information, check out online magazine, and the manufacturers web site. Some of the creations you will see take artists many hours to complete. For advanced grahpics such as flames, and images, may take over 50 hours, but the finished product is worth it, an airbrush is a necessity for some types of graphics. And hey! If you don't feel artistic today, we carry Parma Paint Masks or XXX Main Masks in various styles! Check them out here!
- Use quality masking tape
- Overlap strips
- Press edges down firmly
- Don't leave the masking tape over 48 hours, the stick will stay stuck.
- Remember you will paint dark colors first—mask light areas first
Painting
Painting can be done using a brush, airbrush, or aerosol can. Before you start, cover the outside of the body with plastic. This protects the outside from any paint that might be on your hands, and over spray caused by spray type paints. I use the plastic bag the body usually comes in, just tape it to the edge.
Always work in a well ventilated area, and wear a face mask to prevent breathing any fumes. Apply light coats of paint, three light coats are better than one heavy coat. Allow each application to dry thoroughly. You may find a hair dryer or heat gun will speed this process. A few light coats will adhere to the Lexan much better than on heavy coat, making it more durable in a crash. Single color paint jobs are the easiest, just apply your window masks, and start spraying. To ensure your bright colors stay bright, it's recommended you paint white behind them, or silver if it's a fluorescent color—check the directions reccommended color combinations. This process is called "backing".
- Work in a well ventilated area
- Protect the outside with plastic
- Take your time!
- Paint dark colors first
- Take your time!
- Allow each coat to dry completely
- Apply several thin, light coats
- Oh, and did I say . . . Take your time!

Painted Pro-Line Peterbilt Big Rig

